In this article 5 sections
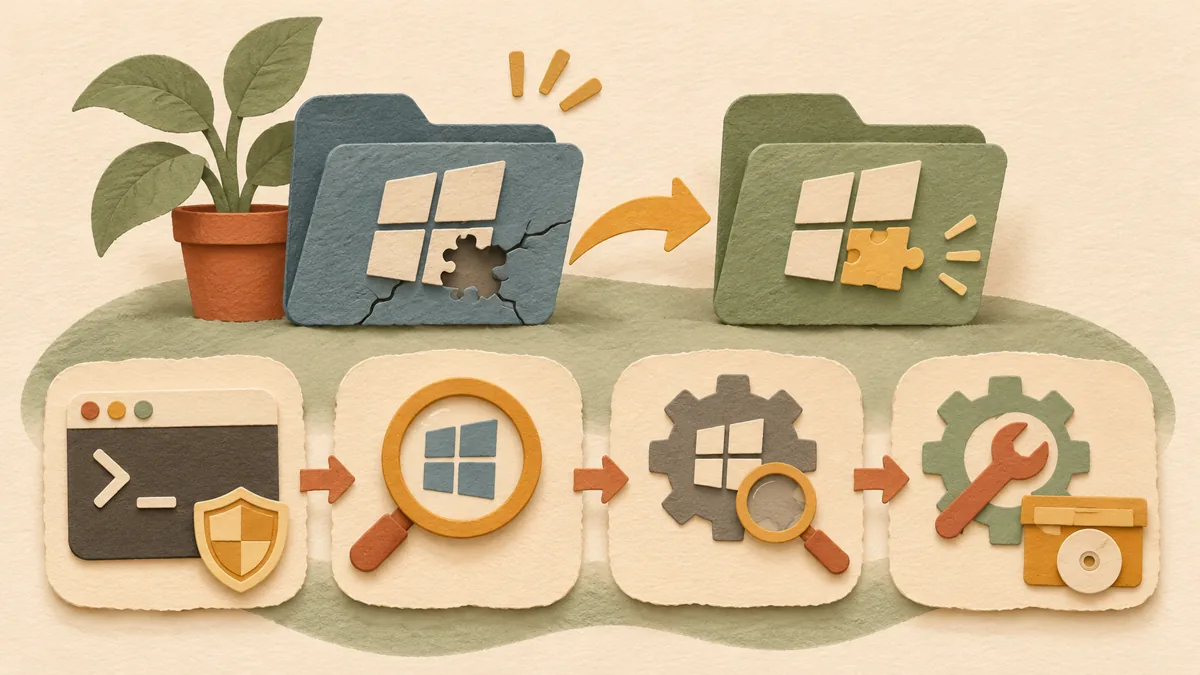
- 1. Open a command window with administrator privileges
- 2. Start by checking with sfc only
- 3. If sfc does not resolve the issue, check the image with DISM
- 4. If it is repairable, use RestoreHealth and check the repair source
- 5. Check again after repair and consider update error codes
When Windows keeps freezing or updates repeatedly fail, people often hear that they should “check the system files.” However, it can be confusing to understand how sfc and DISM differ and in what order to run them. This article organizes the sequence based on the roles of the commands described in Microsoft’s official documentation. It does not report results from running the commands on an actual PC.
1. Open a command window with administrator privileges
The sfc command reference explains that you must be signed in as a member of the Administrators group to run the command. Search for Command Prompt or Terminal in the Start menu, then run it with administrator privileges. The command will be denied without the necessary permissions, so first check whether the window title indicates that it is running as an administrator.
2. Start by checking with sfc only
sfc /verifyonly only checks the status of protected system files and does not repair them. It is suitable when you first want to find out whether there is a problem. sfc /scannow checks the files and then repairs problematic files where possible. According to the documentation, corrupted files are replaced with the correct versions from the system folder. Use /scannow when you need repair immediately, and /verifyonly when you only want to check the status.
3. If sfc does not resolve the issue, check the image with DISM
DISM is a tool for handling the status of the Windows image itself. Microsoft explains that sfc /scannow can be used for a quick check, while DISM /Online /Cleanup-Image is used when a broader check is needed. First, run DISM /Online /Cleanup-Image /ScanHealth to check for corruption. The documentation notes that this operation can take several minutes. Then run DISM /Online /Cleanup-Image /CheckHealth to determine whether the image is healthy, repairable, or nonrepairable.
4. If it is repairable, use RestoreHealth and check the repair source
If CheckHealth reports that the image is repairable, run DISM /Online /Cleanup-Image /RestoreHealth. This command finds and uses the files needed for the repair; if no source is specified, the default repair source is used. The documentation explains that Group Policy determines the repair source location and notes that the /LimitAccess option can prevent Windows Update from being used as the repair source. On a company or school PC, administrator policies may block the repair, so this should be checked.
The documentation explains that if the image is determined to be nonrepairable, you must discard the image and start over. What that step means on a personal PC depends on the situation, so it is safest to back up important files to an external storage device or the cloud before running the commands.
5. Check again after repair and consider update error codes
After repairing with DISM, run sfc /verifyonly again to check whether the result has improved. This recheck sequence is a troubleshooting method organized by the author and is not presented as a procedure specified by Microsoft. If an update failure appears with a specific error code, it is better to first check the code in What to check first when Windows Update fails: the error code ↗ and then apply this sequence. If a driver problem is suspected, also see Windows driver rollback sequence ↗.
This article was organized based on two official Microsoft documents. The command names and options follow the documentation, but actual result messages and repair sources may vary depending on the Windows version, display language, and Group Policy. Check the command string once more before copying and running a command from the internet.
Sources: sfc command reference - Microsoft Learn ↗ · Repair a Windows Image - Microsoft Learn ↗
Sources and original article
Read the Korean original on Naver ↗
This article reflects public information available when it was written. Specifications, prices and schedules can change; check the linked official documentation.
This English edition was written and translated with AI assistance, with sources provided. For errors or additional information, please request a correction. Editorial policy

 Windows